

Well, I’ve been up to something. I’m finally emerging after having gone into hiding to create a super cute tutorial for you, this time using my Timeless Treasures Imagine That fabric collection. Oh, yes, I know, this last tutorialwas incredibly helpful to you. (p.s. you’re welcome).
And because I care so much, I present you with another. This time, it’s actually intentional. Hooray! Plus, it’s fun and unique and sure to entertain your resident baby friend. And if you don’t have such a creature nearby, this makes for an awesome baby shower gift…
‘A Bear in a Boat’ musical crib toy!
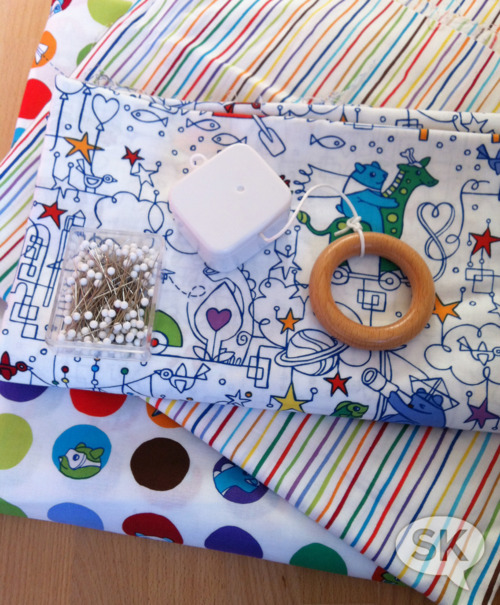
What you’ll need:
- A fat quarter – for the bear body
- A fat quarter – for the boat exterior
- A fat quarter – for the boat interior and bear embellishments
- A fat quarter or less (depending on your crib measurements and musical mechanism string length) – for hang ties and pull-string cover
- A small pull-string music box mechanism (measuring approx. 2"x 2"x 1" or smaller; see details below)
- Stuffing
- Two 16mm felt discs – for the eyes (DISCLAIMER: Babies can pull off and choke on buttons, so fully-attached felt discs are safer; I used 16mm buttons with shanks for this tutorial, as I plan to have it hang far away from the crib and my baby’s reach. Be aware of this hazard and keep things safe for baby.)
- Embroidery thread – for the nose and mouth (I used two colors, just for fun)
- Light or medium-weight interfacing (optional)
- Chocolate or candy – for snack breaks (mandatory)
Please read through these instructions first, as you might find you’ll want to make a few adjustments to the fabric and pattern before commencing.
Cut out all necessary pieces for your crib toy, using this handy pdf (print it out at 100% scale). Make sure to iron all your fabric pieces so everything’s nice and flat and easy to work with. All pieces should be sewn with a ¼" seam allowance unless otherwise noted.
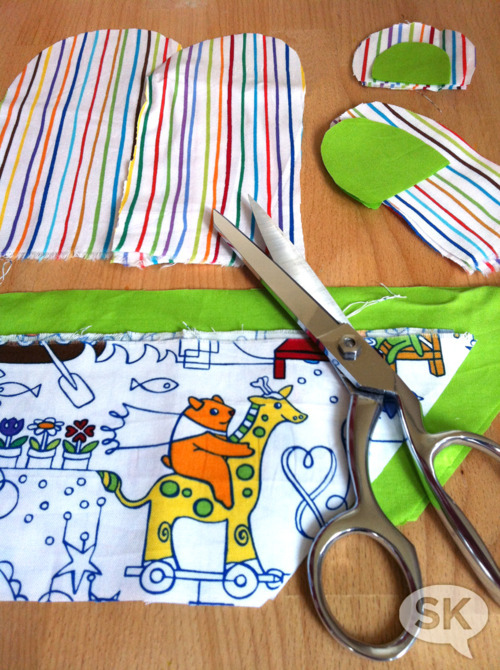
You really can use any combination of fabrics to create this. I’ve used my Stripes for the bear, Animals in Dreamland for the boat exterior and my Paper Airplane Dots for the pull-string cover and hang ties, and rounded everything out with a matching solid green for the boat interior and bear ear insides and paw pads. There’s no wrong combo, so select what you like!
Set everything aside and let’s tackle making the ears first.
Take two of the four main ear pieces, right-side-up, and place one each of the two smaller ear details (also right-side-up) on top of each of them, aligning the straight edges. Pin together and zig-zag stitch around curve, leaving straight edges open, appliquéing them together like this…
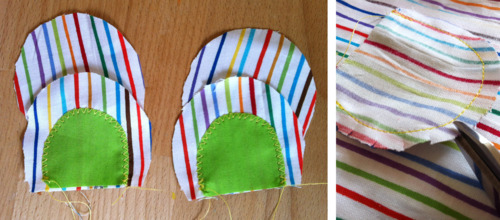
Now flip the finished ear fronts over and sandwich them face-to-face with the remaining two main ear pieces. Pin and sew curved sides of each ear, leaving straight edge open. Snip into allowance for better curving. Now turn each ear right-side-out. Iron and topstitch around edge.
Take a chocolate-eating break. Stand up from sewing machine, stretch five times into the air, pat yourself on the back and put your new bear ears off to the side, because it’s arm time now…
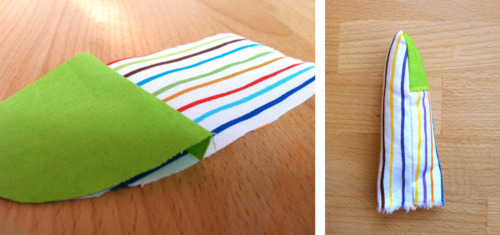
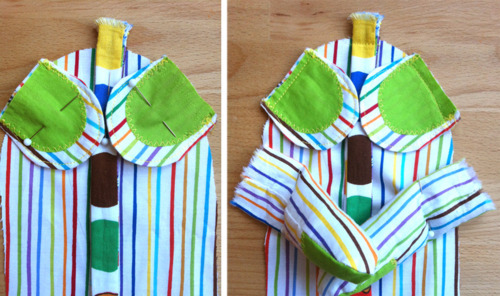
Take the two bear paw pads and iron over a ¼" fold along the straight edge; see above left. This will make for a nicer finished edge when you appliqué them with a zig-zag stitch. Using two of your main bear arms right-side-up, line up one paw pad on each (with the fold facing downward), matching up the curved sides. Pin together. Zig-zag stitch along straight side to anchor everything together.
Now sandwich remaining main bear arms to these pieces face-to-face. Pin together and sew around entire edge, leaving the straight side open. Snip into seam allowance around the tip of both arms for better curving. Turn arms right-side-out and iron. Now fill them with stuffing, packing more in closer towards the pad area and leaving them less dense at top of the arm area.
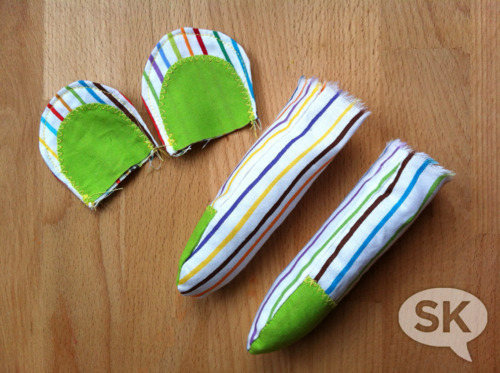
This is what you should have so far…
Admire what you’ve made so far. Eat a bit more chocolate for sustenance. If you’ve run out (oh, the horror), shout out into space, “I need more chocolate. STAT!” If nobody is around to hear and answer your call, feel free to bark out louder, because that’s therapeutically fun all by itself.
Because, let’s face, we’re on a roll and there’s no stopping this bear now!
Now on to the hang ties…
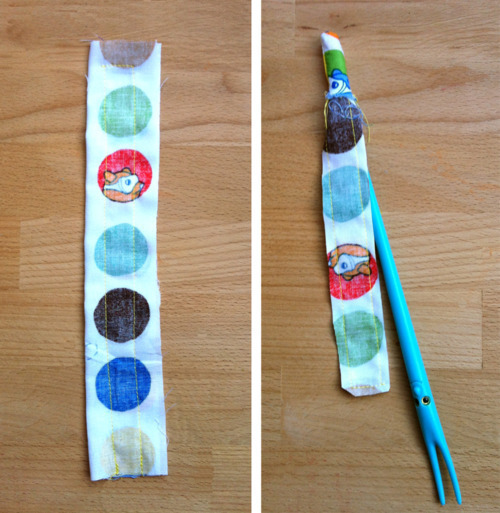
Because I wanted to use my Paper Airplane Dots fabric, I made sure to line everything up so the dots would be centered on each finished piece. With your pieces face-to-face, pin them together and sew up both long sides and one short side, leaving the remaining short side open. Trim your allowance down to 1/8" and snip off the corners, so everything will lay more smoothly when you flip it all inside out.
Now this part will take a few moments. You might want to reenergize with a sweet treat before commencing. Just a suggestion.
Using either a knitting needle (don’t poke through your fabric!) or in my case, one of our household’s random wacky anthropomorphized chopsticks, you will slowly but surely poke and shimmy and snake this crazy little thing right-side-out. Ta-daa! That’s a feat all by itself. Congratulations. Now iron it flat. Repeat all this with the other hang tie.
Next up is the pull-string cover*, which works in an almost identical way to the hang ties, except you will not sew up either of the short sides but rather will hem them both separately first. After hemming both short ends on each rectangle of fabric, sandwich both pieces together face-to-face and sew up long sides. Trim allowance to 1/8". Turn right-side-out using your knitting needle or chopstick. Iron flat.
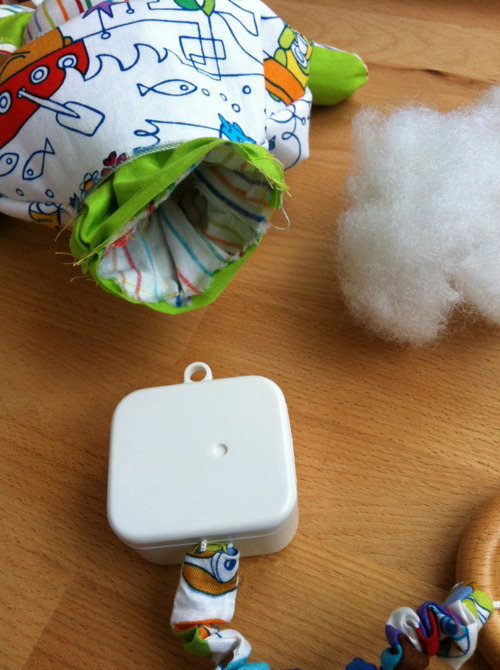
* To sort out how long your fabric will need to be for this, you’ll need to pull the string all the way out from music box (and listen to the music as it slowly retracts. Bonus!), Measure the full length of your string. It will vary based on the type of mechanism you have. Full disclosure: I salvaged my mechanism from a hideous crib toy I had when The Bub was a wee tot. I couldn’t bring myself to looking at it the way it was, and so as not to trash the entire thing, I ripped it apart (hello, another totally satisfying activity if you’ve never tried it) and this is the bare-bones mechanism I had left. A quick internet search will yield you a source similar to this or you might consider looking around at your local flea market or eBay for a crib toy you can repurpose. Make sure you get something about the same size as mine, or else it won’t fit inside the completed bear body pattern I’ve provided; you’ll just have to adjust the pattern and cut out a wider bear body in that case.
This next part will vary slightly depending on your exact mechanism…
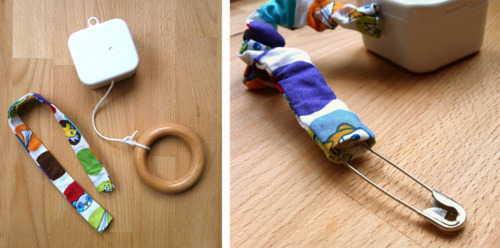
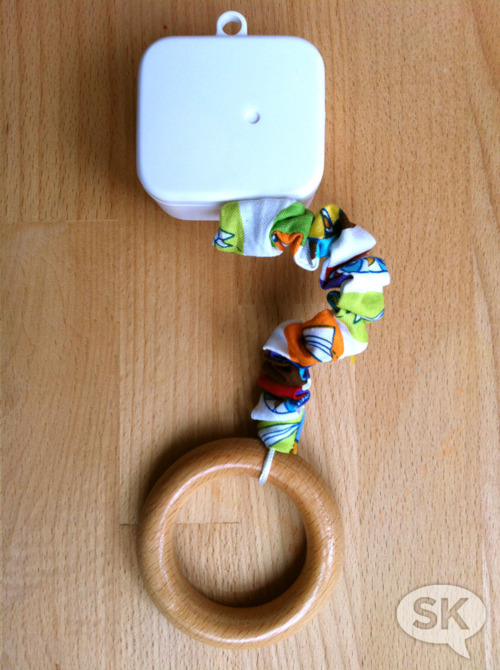
I then untied the string from the wooden pull ring, attached a large safety pin to the end of that string and snaked the fabric tube onto it until the entire string was covered. The best part about this is that you want it to bunch up and it will, so your overall tube measurement can be off in the more or a lot more department, just as long as it’s not too short. Because that would be an obvious error not easily masked and it would really stink after all this work so far.
I then tied and knotted the wooden ring back securely onto the string. Voila, you should now have something that looks similar to this…
Now a small happy dance is in order. And you know I’m going to suggest more chocolate now. Duh. Just don’t blame me at your next dentist’s appointment. If you do, at least bring this crib toy with you to show the goodness for which you’ve exchanged a cavity or two.
Put the pull-string mechanism aside, as it’s time to now start assembling the bear.
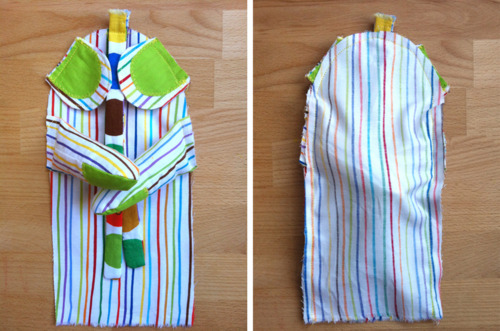
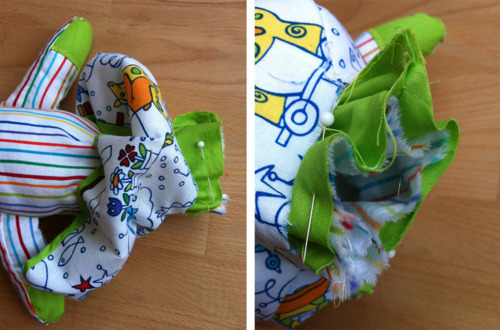
Take one bear body piece and lay your ears and hang ties (stacked one on top of the other) on top of it, as you see in the below left photo. Pin down and baste them, cuz this will get a bit tricky and you don’t need shifting of little pieces. For time’s sake, I opted to do a quick machine straight stitch over everything.
Now place both bear arms on bear body; see above right. I flattened each arm seam-to-seam, so the paw pads would face downwards. I also angled the arms down slightly for a more relaxed look, because I don’t want the bear to get all tired holding his arms straight out like that for all of infinity.
Pin arms to bear body, baste stitch them in place and trim off excess arm fabric. Now your bear should look like the below left photo, which I can’t help but think looks like a really weird fly at this point…
Take your other bear body piece and sandwich it together face-to-face with what you’ve already prepared. Pin together and straight stitch around entire piece, leaving straight edge open at bottom.
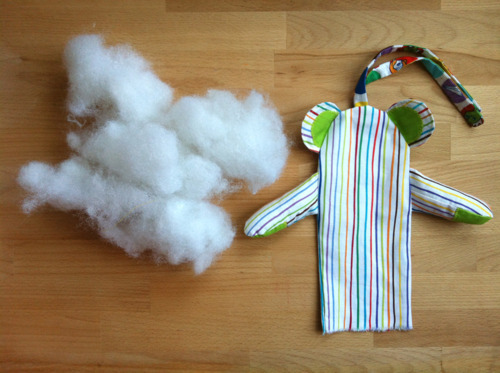
Turn the entire thing right-side-out, iron and stuff with filling.
Put aside your glorious bear, we’re going for a boat ride now…
I chose to use heavier-weight interfacing for my boat (um, because it was all I could find in my stash at the time), which may have been overkill and a bit more difficult to turn right-side-out, so go with something lighter or no interfacing at all if you prefer.
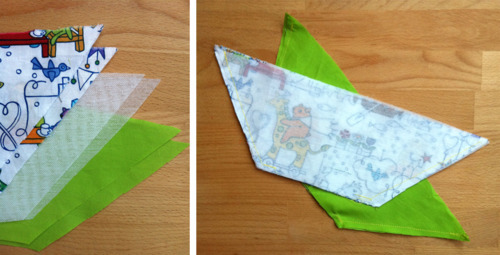
To create the boat exterior, sandwich your two exterior boat fabric pieces face-to-face. If you’re using interfacing, you’ll then place each of those pieces on the very bottom and top of this stacking arrangement.
Now stitch both angled boat sides (the bow and stern, if you will), leaving top and bottom straight edges completely open. Next, sandwich the two interior fabric pieces face-to-face and stitch along the same bow and stern edges of those pieces.
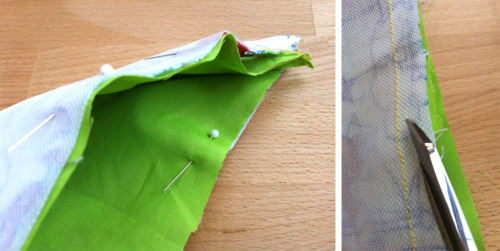
Next, turn the interior boat piece right-side-out. Insert that entire piece into the exterior boat piece, so the exterior fabric is face-to-face with the right side of the interior fabric. Pin and sew all the way around. Trim allowance down to 1/16".
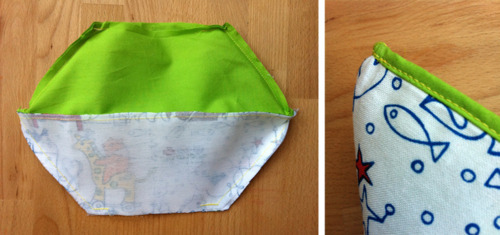
You boat should now look like the above left photo, with all seam allowances facing out. Turn entire boat right-side-out through one of the open sides remaining. Now topstitch around top edge of entire boat. If you haven’t used interfacing, you may or may not have a strip of interior fabric showing along the edge at all; not to worry, it will still look splendid.
Time for more chocolate? Must you even ask?
Now we’re ready for the final assembly steps. Smile gleefully because, guess what, you’re almost done…
Take the bear body and insert the open bottom end into the boat. Line up that edge with the interior boat lining edge. Pin and sew all the way around.
The bear is now in the boat! Alert! The bear is now in the boat!
Like so…
Get ready because it’s all gonna get real now.
Insert the music box mechanism into the bear/boat bottom (say that 10 times fast). If needed, add a bit more stuffing. Now pull the boat exterior down below everything.
Hand sew the boat exterior shut with an invisible ladder stitch to close everything in. If you want, you can anchor the end of the pull-string fabric in with this stitching, but make sure not to sew too tightly around the string itself, as it will need space to pull and retract easily when playing. One thing you may or may not have to do, depending on if you chose to use interfacing, is tack the top of the boat interior to the bear body on both sides of the toy, just to ensure that the boat stays in place and doesn’t collapse down on itself. Consider it an extra safety measure for the bear once he’s on the high seas.
Guess what? You. Are. Almost. Done….
It’s face time. Now sew on your two felt discs (remember, I did use buttons here, but felt discs are less of a potential choking hazard) for the eyes. If you’re really adept, you can certainly embroider on a pair of cute eyes. Now embroider a cute nose and mouth for the bear. As babies can pull off and choke on buttons, and we don’t want that, I highly recommend the felt disc or embroidery route (I used buttons with shanks in my example here, but I plan to hang this completely out of baby’s reach.) The look will be the same and any picky-fingered babies won’t be tempted to gouge bear’s eyes out and eat them in front of him. How barbaric.
And what do you have now?
Are you ready to see?
Have your last pieces of chocolate now, because…
.
.
.
TA-DAA!!!!
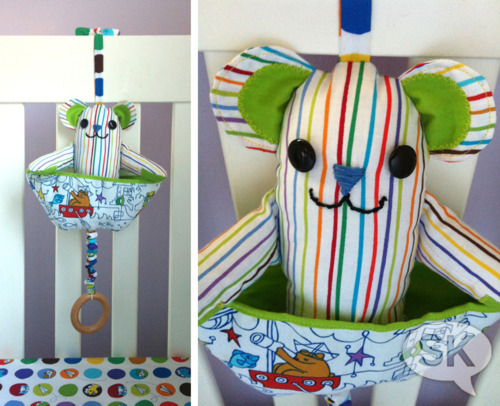
Isn’t this bear nothing short of AWESOMESAUCE?!?!?!
You can see I specifically cut out an exterior boat piece that has a drawing of a bear in a boat too, just for added cuteness. If your music box plays, ‘Row, Row, Row Your Boat,’ you will have exceeded the cuteness level I was able to attain here.
Godspeed, grasshoppa.
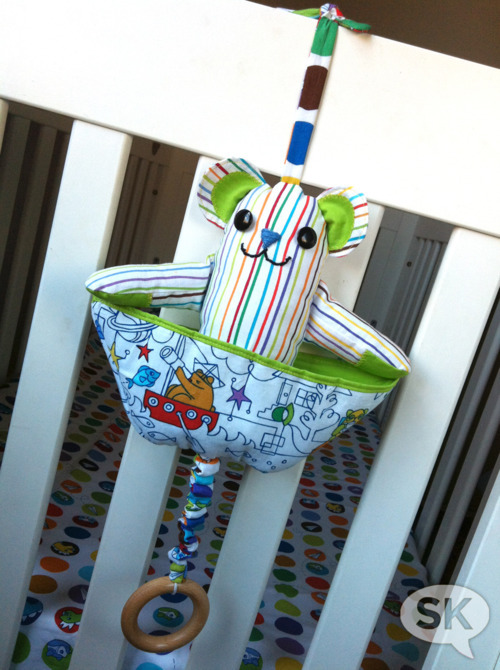
And there you have it! ‘A Bear in a Boat’ musical crib toy! Pair this with some matching handmade crib linens and blanket and baby will not want to come out, I tell you. Sleep for everyone!
Applaud yourself once again. Take a bow. And enjoy your new bear friend!
😀
————————————————————————–
**If you find any instructions missing, please let me know. This is my first ever for realz tutorial *blush* and with all my plate-spinning, it took me a couple of weeks to fully finish, so I might have blanked on telling you some minor detail. I seriously doubt that *coughcoughbecauseI’mperfectcoughcough* but just in case, let me know!