

It’s just about that time, folks! Time to buy gobs of school supplies and get that brain ready to absorb as much juicy knowledge as possible. And in between all that, any kid knows that good sleep is a must.
Enter the Nap Mat, the perfect back-to-school cuddly quilt to make your little child very happy while they nestle into a recharging afternoon siesta.
With my trusty cohort, Quilter Steff, we bring you this great tutorial you can whip up just in time for the first day back to class.
So, let’s get to it!
Nap Mat Instructions:
Fabric Requirements:
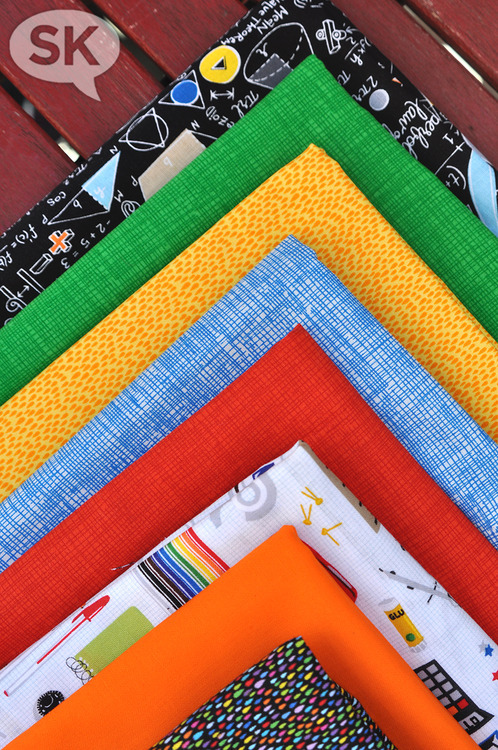
School Supply Fabric: ¾ yard
Math Fabric: 1 ¾ yard
5 coordinating colors: ¼ yard of each. We used Blue Sketch, Red Sketch, Solid Orange, Green Sketch, and Yellow Rain from Timeless Treasures.
For backing: 1 1/3 yards of coordinating fabric.
For binding: 1/3 to ½ yard depending on how wide you like your binding.
Cutting Instructions:
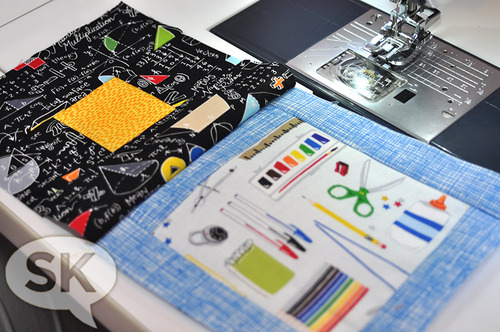
School Supply Block:
You will need a total of 25 blocks. That is 5 of each of the 5 colors.
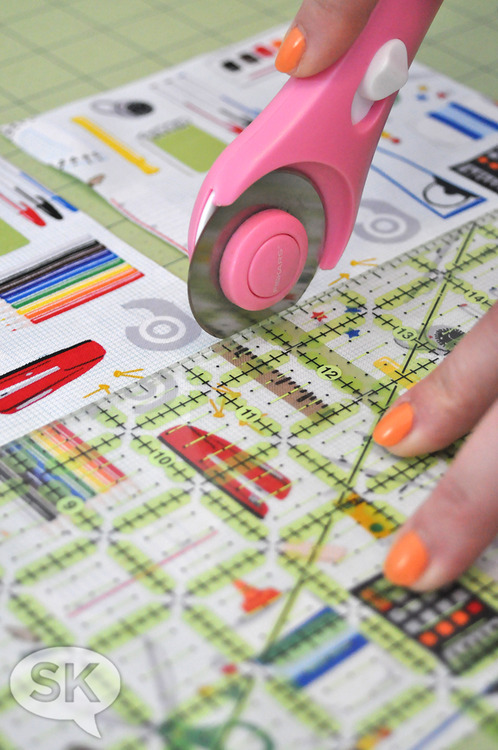
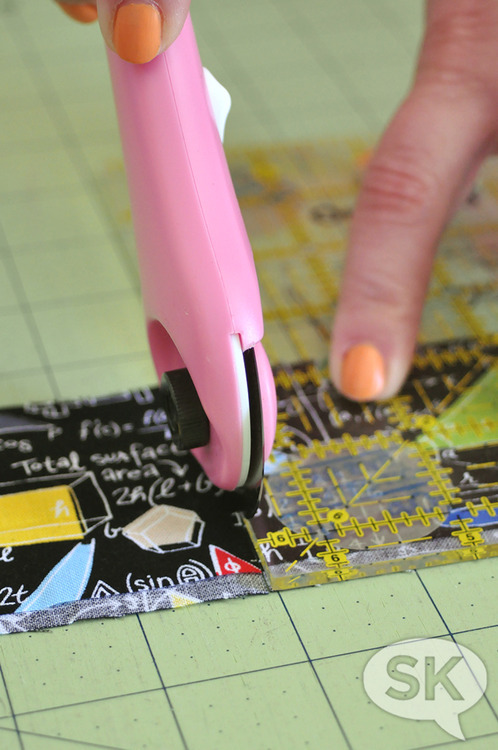
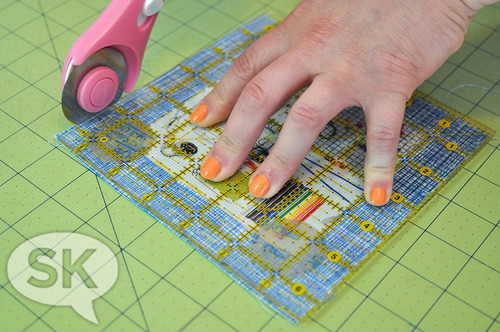
From the School Supply fabric cut four 5” cuts that run selvage to selvage. Now cut the 5” strips into 5” squares. You need a total of 25 5” squares.
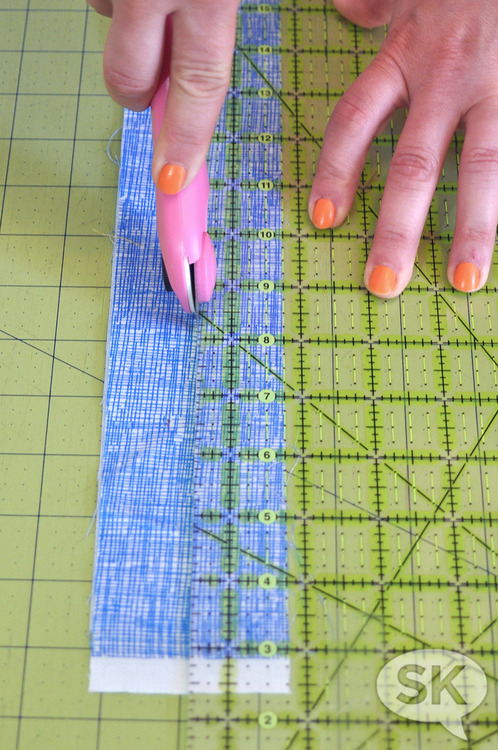
From each of your accent colors cut four 1 1/4” cuts that run selvage to selvage. For each block that the accent color will border, you will need two cuts 5” long, and two cuts 6 ½” long.
TIP*** If you are not confident in your ability to sew an accurate 1/4” seam, cut your accent strips to 1 ½” wide x 7” long instead of 1 ¼” x 6 ½”, and trim the block down to 6 ½” square when all borders are added to the School Supply fabric.
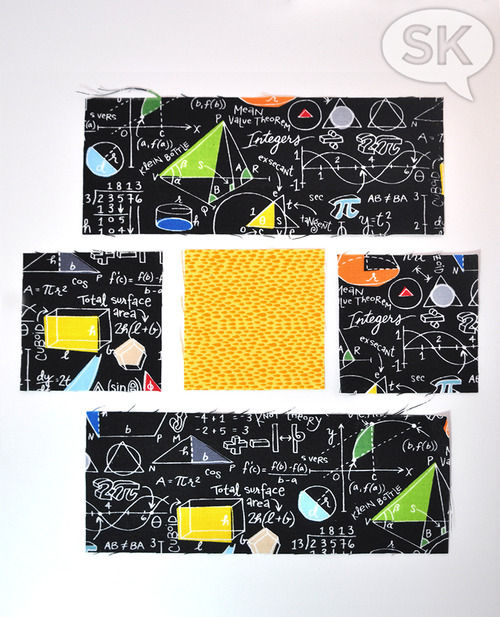
Math Fabric Block:
From the Math fabric, you will need to cut eleven 2 ½” cuts that run selvage to selvage. These strips will be subdivided into 6 ½” strips for each of the blocks. There are 24 blocks, so you will need 48 pieces (2 for each block) that are 6 ½” long that are cut from your 2 1/2” strips. You will also need 48 squares (2 for each block) that are 2 ½” square.
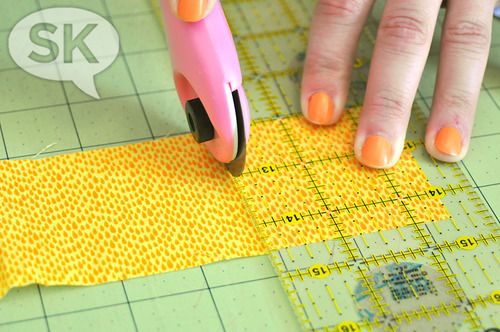
For the center of each block, you will need a square of accent fabric that measures 2 ½” square. You will need five squares from 4 colors, and 4 squares from the fifth color, for a total of 24 blocks.
Each block is made up of two pieces that measure 2 ½ x 6 ½ and three pieces that are 2 ½ “ square.
Piecing Instructions:
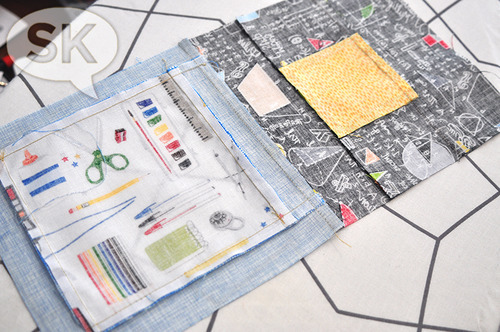
For School Supply Block:
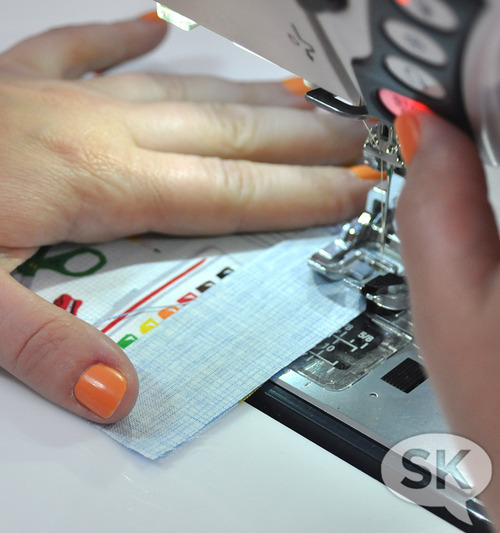
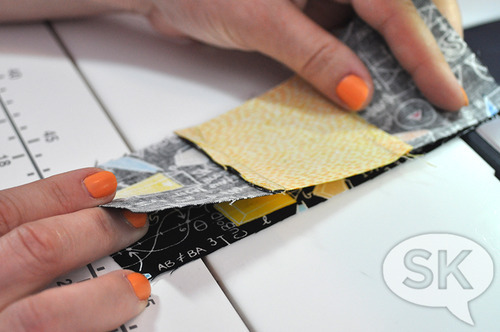
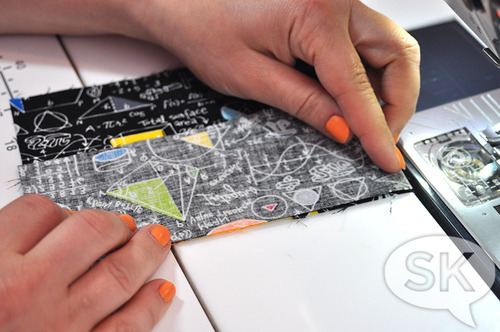
Sew an accent strip to one edge of your 5” school supply block.
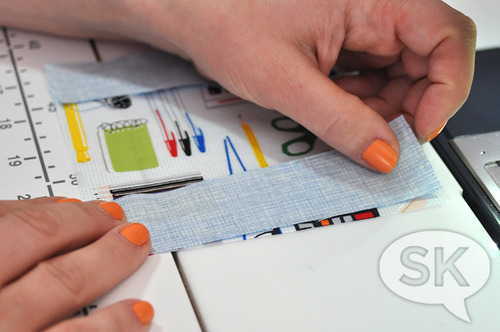
Sew an accent strip to the opposite edge of the 5” school supply block.
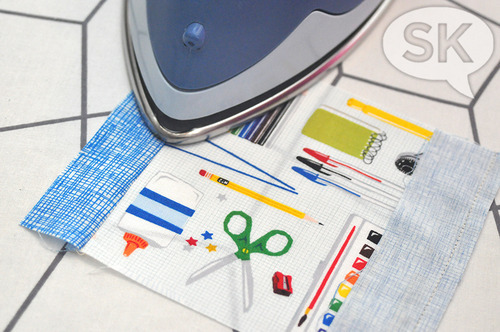
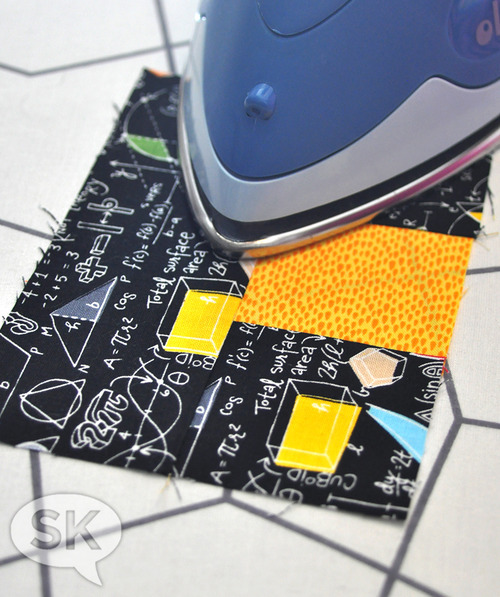
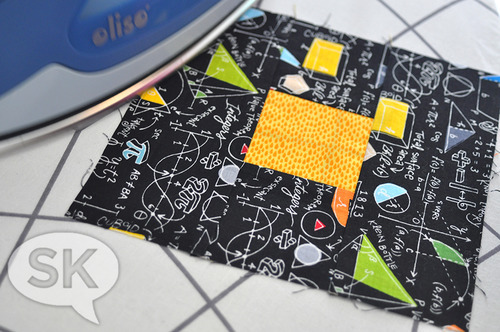
Press the seams neatly toward the outside of the block.
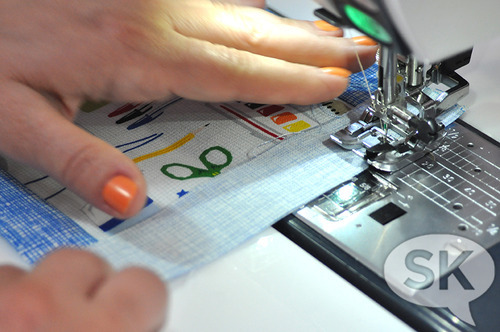
Sew an accent strip to each of the two remaining sides of the block.
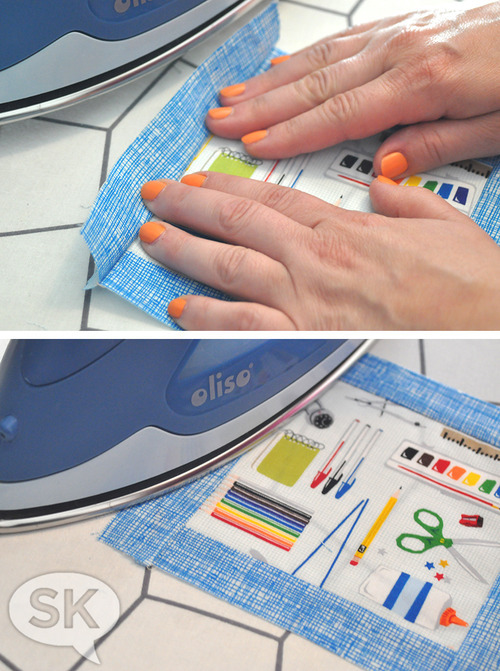
Press the seams neatly toward the outside of the block. Now this block is done!
*** If you cut your strips 1 ½” in size instead of 1 ¼” you will need to trim your completed block down to 6 ½” square. Be sure to center the ruler in the middle of the block when cutting, so the borders are even on all sides.
For Math Block:
This block will be made in rows and we will start with the middle row. You will need two of your 2 ½” math fabric squares, and one 2 ½” accent color squares.
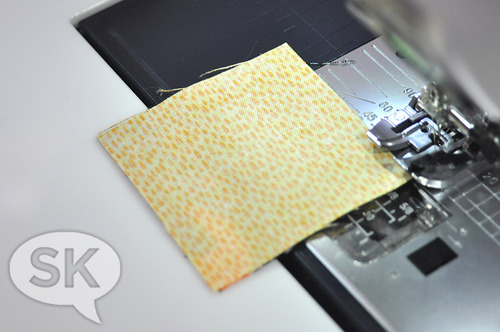
Sew a math fabric square to opposites edges of the center square.
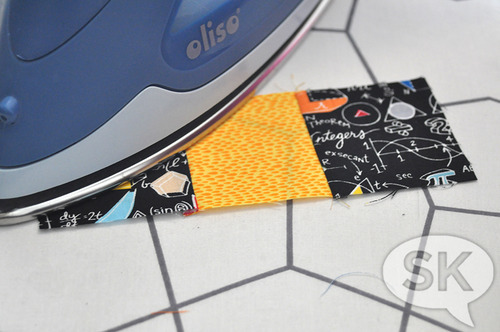
Press the seams both towards the same direction on the block. This will make it easy to sew to the next row of fabric because all of the seams will be going in the same direction.
Once neatly pressed, take a 6 ½” long strip and sew that to the long edge of your row made in step 1.
Press the seam toward the long piece of fabric that you just added. This will help the bulkier seams from the center row lay flatter.
Add the second 6 ½” strip and add that to the opposite edge of your center strip that you constructed in step 1.
Press the seam toward the long piece of fabric that you just added, just like in step 4.

Continue this process 23 more times, for a total of 24 Math Fabric blocks.
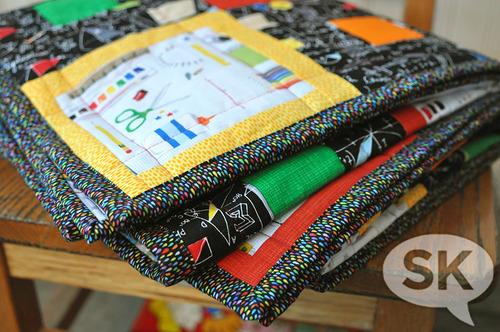
Piecing the Quilt Top:
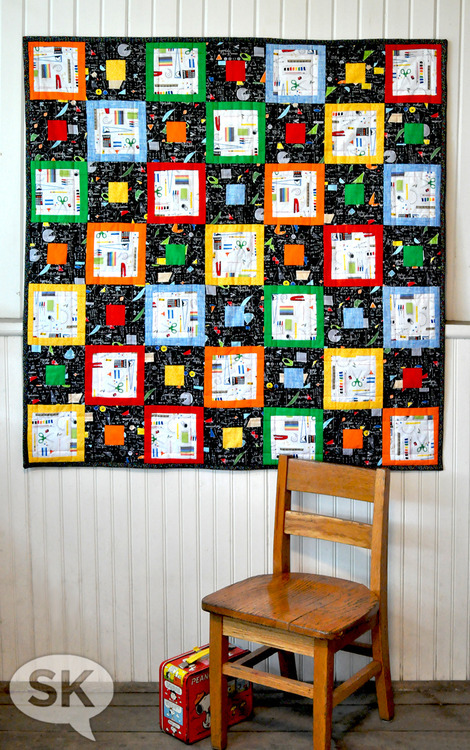
Arrange the blocks, alternating one of each, starting with a School Supply block in the top left corner of the quilt. There will be 7 blocks across, and 7 blocks down. Be sure that you like the color arrangement before you start sewing.
We recommend sewing blocks in pairs first, and then into rows.
Press all of the seams in the same direction for each row, and then opposite for the next row, so they “nest” together neatly when you sew the rows together.
Continue with this process for each of the 7 rows.
The last step is to sew the rows together. Because you have pressed your seams in opposite directions, you will easily be able to line-up each row, and match-up the seams in-between each of the blocks.
To complete the quilt, you will layer it with backing fabric, and batting and quilt with a pattern that you like. We decided to go with a simple straight line design since the fabric patterns are already fairly detailed.
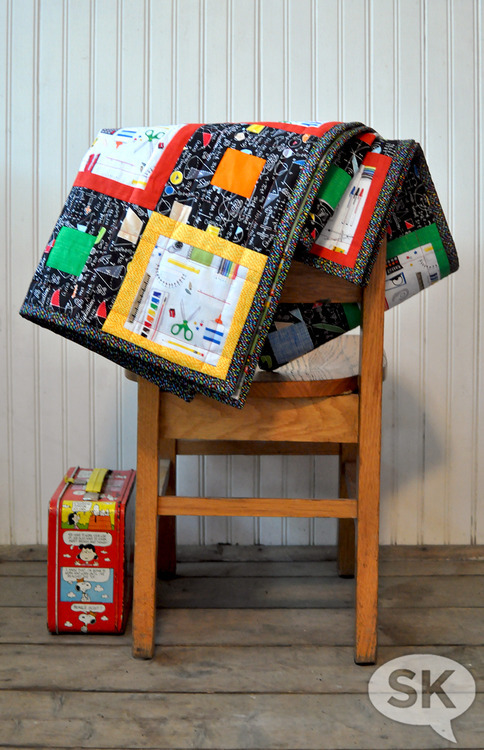
And you’re done! Now go get in there and learn bunches of smarty pants stuff, kiddos! And take your new Nap Mat with you!
Have a great school year!