

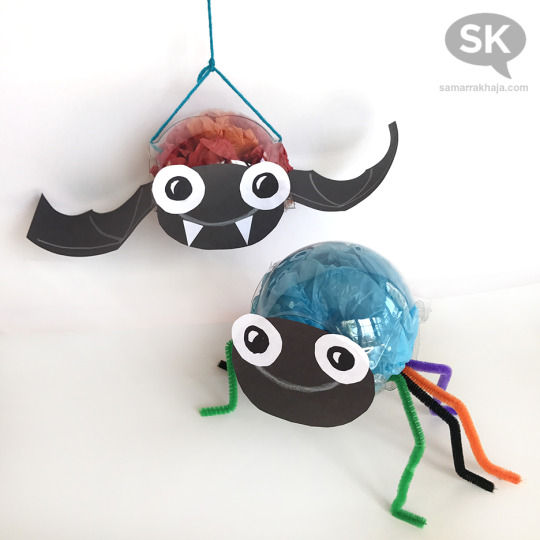
If you missed it the other day, I posted Part 1: Rollie Spiders, which is an alternative way to recycle these same plastic apple cartons I’ve been mildly obsessed with wanting to reuse. Suffice to say, I was very pleased to come up with not one but two ways to repurpose those darn things before they wind up in the landfill.
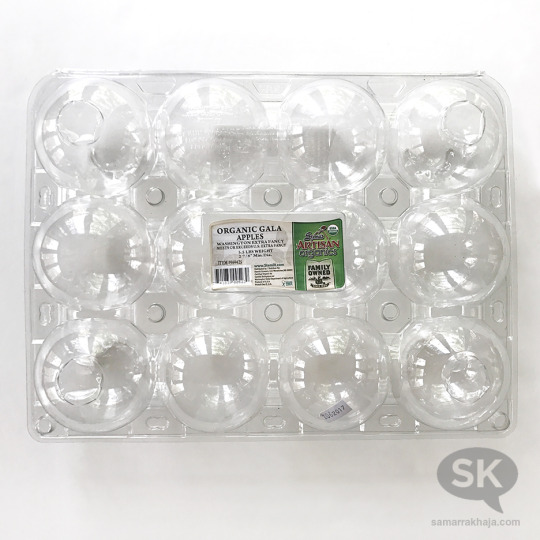
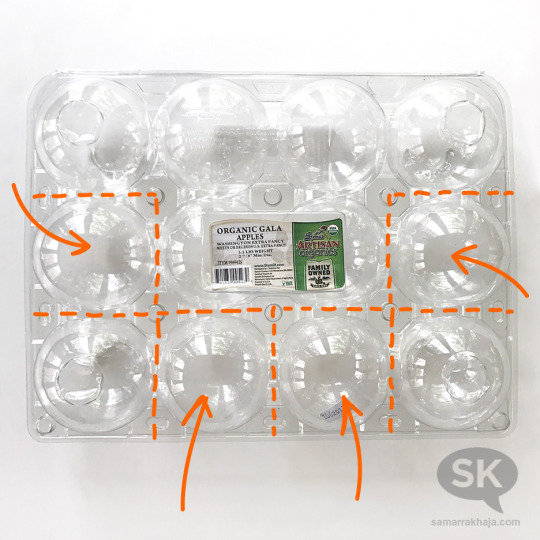
If you missed it, this is the plastic apple carton I’m referring to:
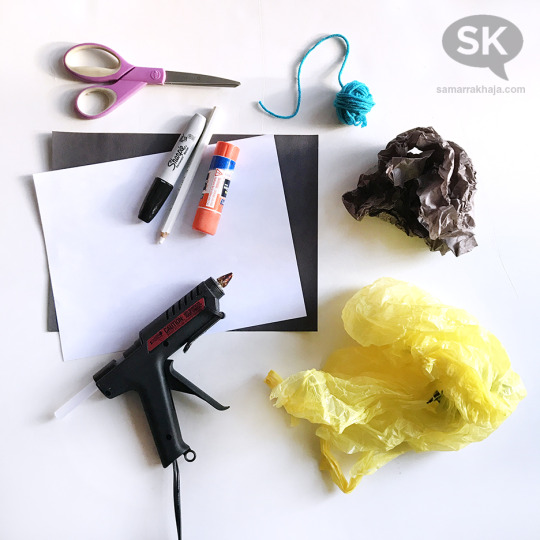
Here are some of the other things you’ll need to create your Rollie Bat:
• Hot glue gun and/or a glue stick
• Black and white construction paper and/or recycled white bottle caps
• Tissue paper or brightly colored recycled grocery bag
• Long piece of string, thread, yarn or embroidery thread
• Black permanent parker and white colored pencil
• Scissors
As I mentioned before, you’ll be able to use 4 spheres from a 4w x 3 h carton to create your Rollie Bats. These are the only unobstructed spheres on the carton that don’t have additional weird shapes moulded into them:
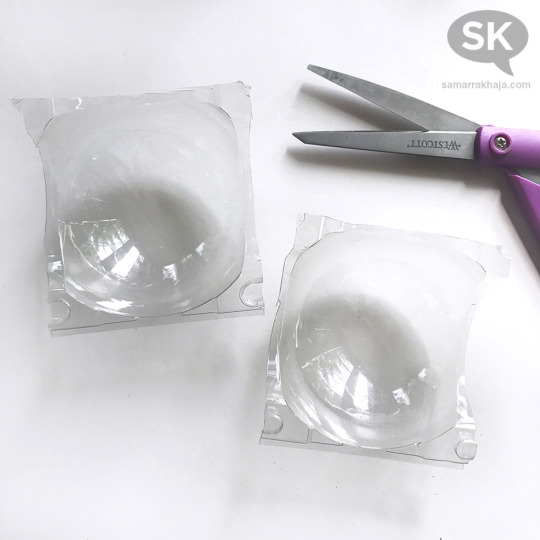
Begin by cutting each half of your sphere out:

You’ll get two pieces that look like this:
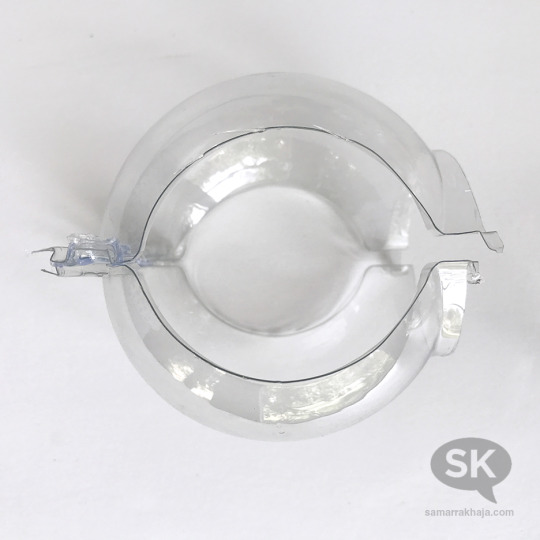
Snap them together, and your sphere will look like this:
BAT WINGS:
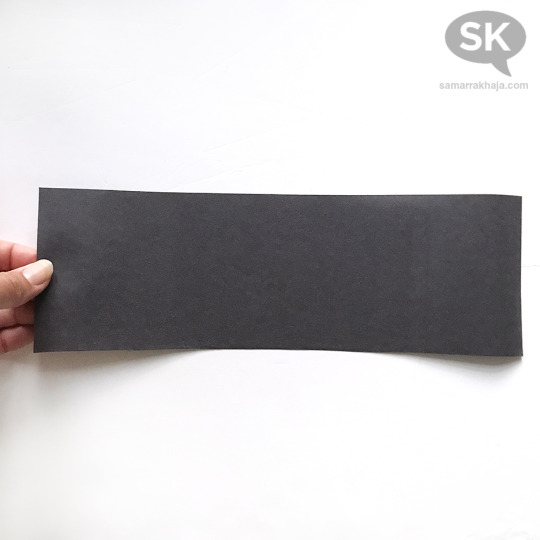
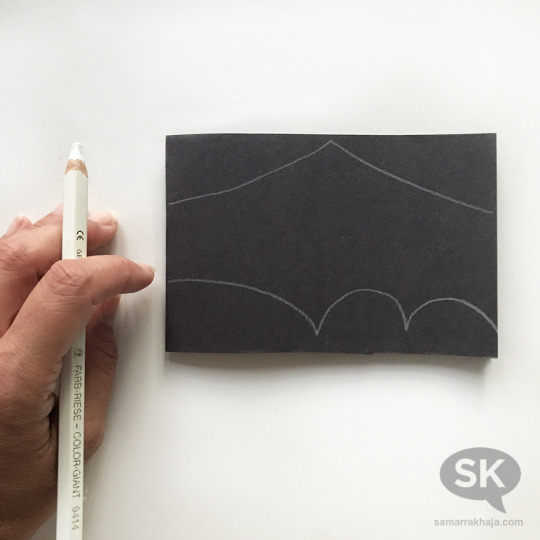
Cut a piece of black construction paper to approx. 12″w x 4″w:
Fold the rectangle in half (the fold is on the left in the photo below) and draw a wing shape on it, like so:
Next, cut out your bat wings:
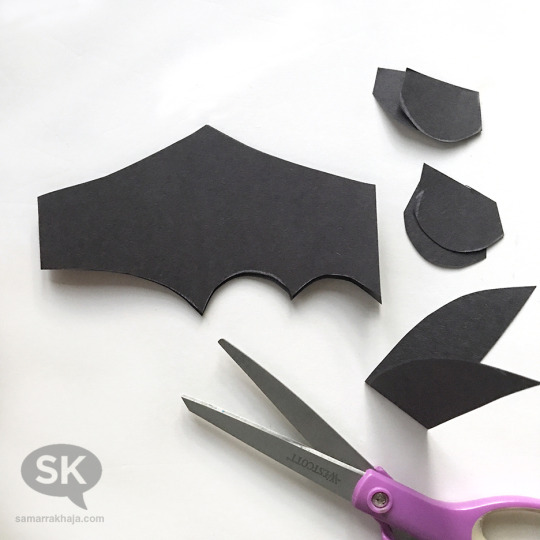
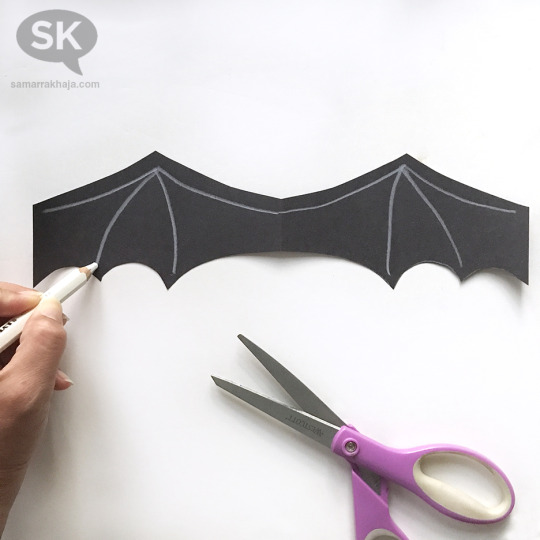
Unfold the paper and draw any sort of pattern you’d like on each wing, using a white colored pencil:
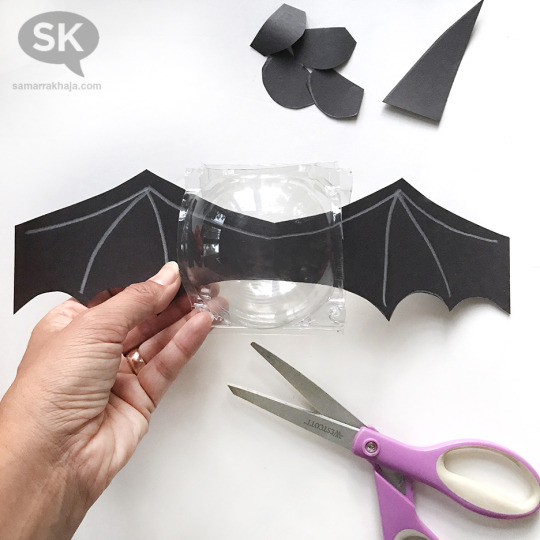
Once your wings are ready, place them inside your bat body to make sure they fit nicely; if they don’t, trim as needed:
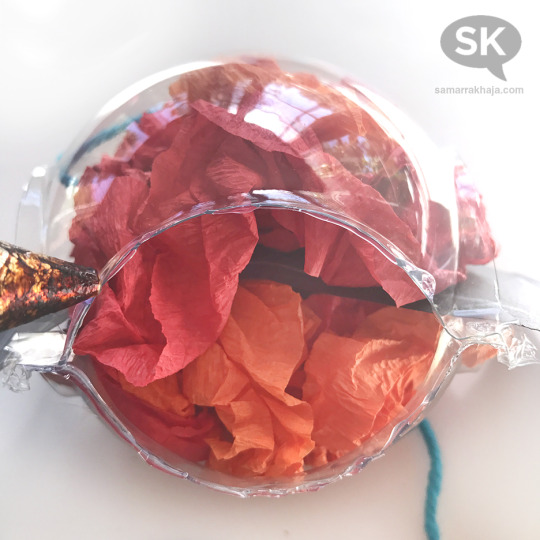
Once you’re happy with your wings, stuff your recycled grocery bag or colored tissue paper evenly above and below the wings, securing them nicely within the center of the sphere:
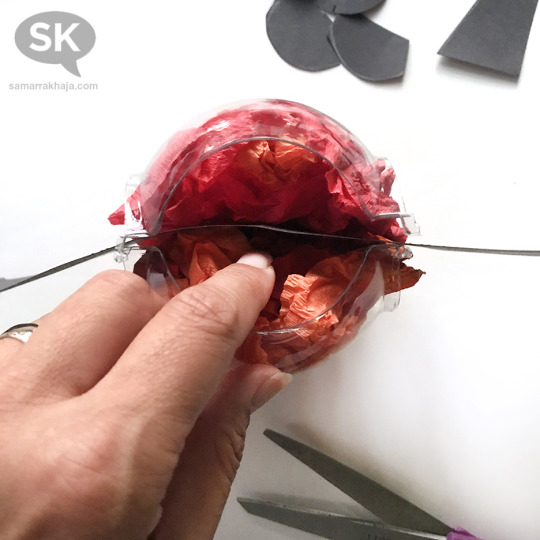
Slide in some colorful string of your choice inside the top half of the sphere (and below the tissue paper inside, so it’s nicely hidden and secure) and tie a knot top. Chose any length for your string, as this is what you’ll hang your finished bat up with:
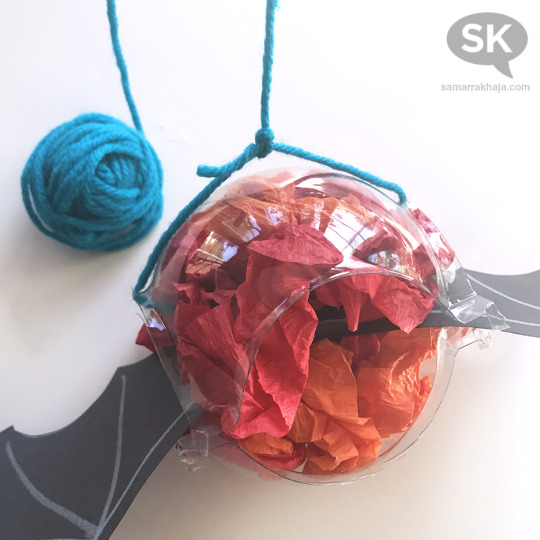
Hot-glue the two front corners of the plastic sphere together, like so:
BAT FACE:
Now that most of the body is complete, let’s switch over to creating the bat’s face. Using black construction paper, cut an oval out that’s approximately 3.25″w x 2.25″h.
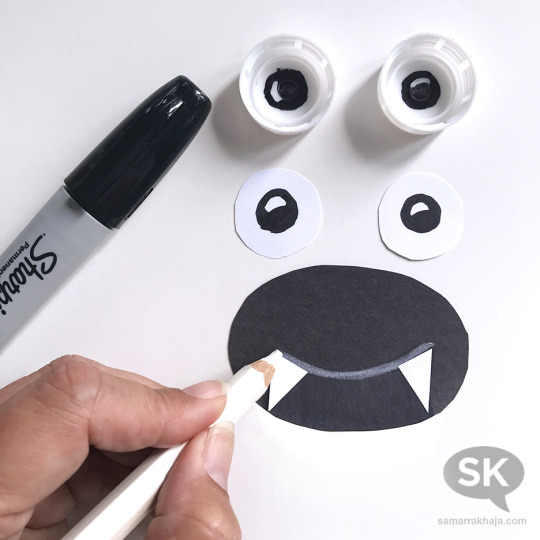
For the eyes, you can do one of two things: Either cut out two 1.25″ diameter circles out of white construction paper –or– recycle two white bottle caps (I got mine from seltzer bottles). Using a black permanent marker, draw your pupils.
Cut out two fangs out of white construction paper and glue them in place with a glue stick. Use a white colored pencil to draw the mouth:
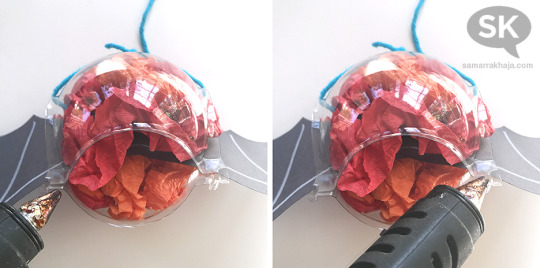
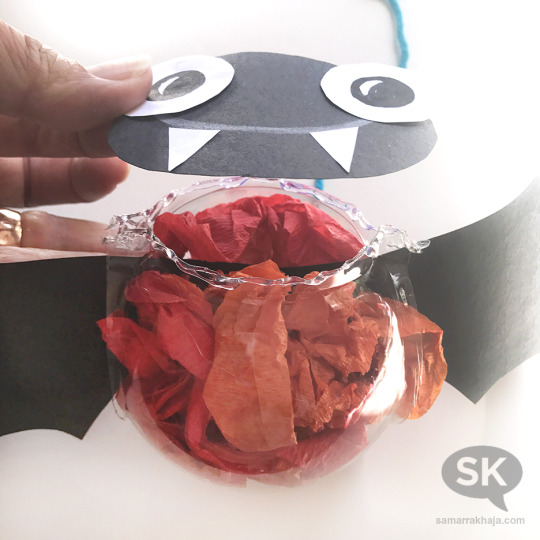
This next part will take some slow precision: use the hot glue gun to put a bead of glue all the way around the front oval opening edge. Go slow. You won’t need too much to ensure the face sticks on well. Don’t over-glue as it could start to melt the plastic:
Attach the face onto the center of this freshly glued edge, being careful not to burn yourself:
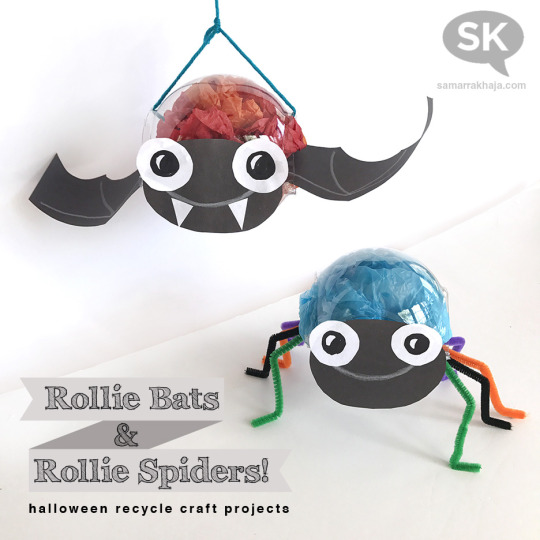
That’s it! Your recycle-proud Rollie Bat is complete!
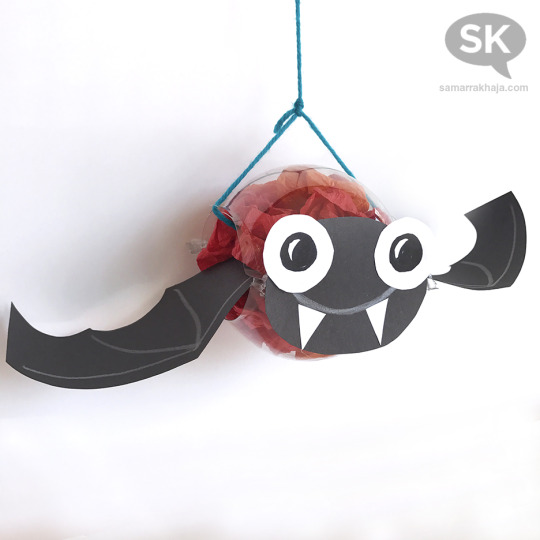
Enjoy and HAPPY HALLOWEEN!!!! And remember, be nice to bats because they actually do GREAT THINGS for us!!!
P.S. Make sure to check out my Rollie Spider tutorial, which also uses this same plastic apple carton!
xo-sk